Showing posts with label wanna tri? play-along. Show all posts

27 October 2012

bloggers quilt festival

What's up?

It's time for bloggers quilt festival fall 2012, hosted by the lovely Amy. And we have a quilt we want to share with you all:

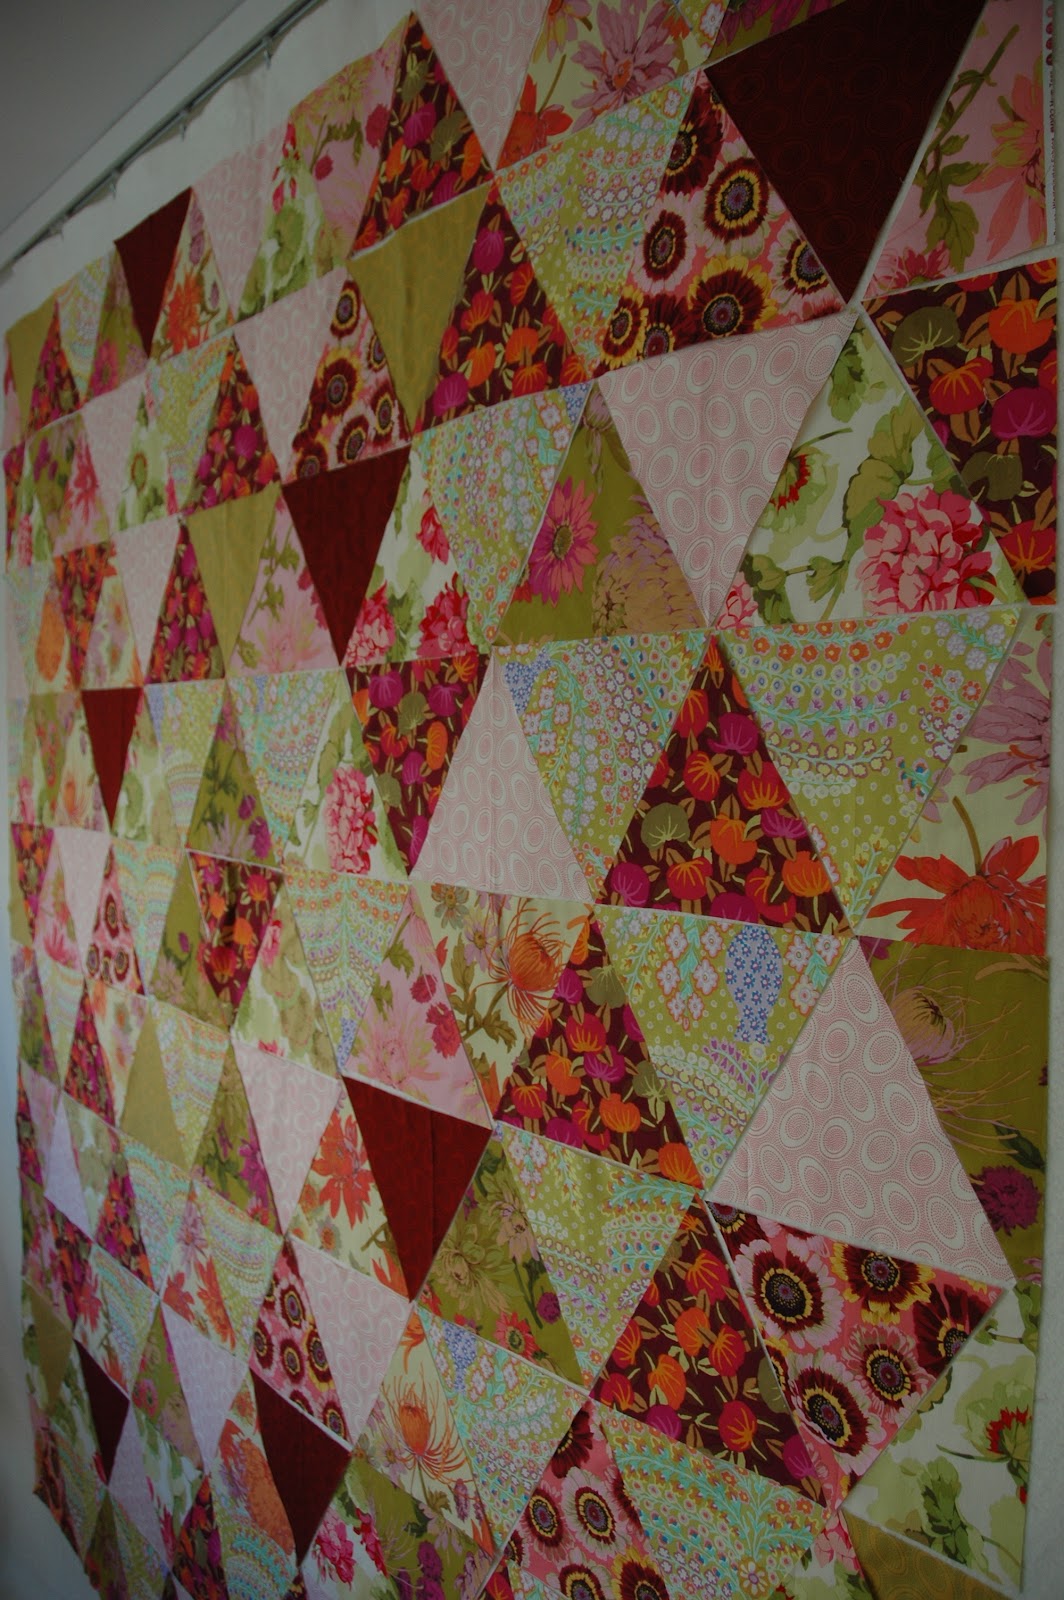
quilt name: Ghastly triangles
quilt measurements: 50" by 70"
special techniques: using a 60 degree ruler for the 8" unfinished triangle patches
hand-quilted by myself: marit, on quilters dream request cotton batting
best category: favorite hand-quilted quilt / favorite throw quilt


It's hand-quilted with perle no16, using an embroidery needle. If you are a regular visitor to my blog, you may know that this summer was my summer of making triangle quilts.

Ghastly triangles is my 7th and last triangle quilt started this summer. They are all lap size and quilted by hand. Six of the are living with me. As you understand, I got quite carried away, having so much fun with these big patches on my quilt batting design wall... 


My challenge was to use fabric from stash. The last bigger piece of the Ghastly family ended up on the back:


Have fun visiting more great quilts on the blogger quilt festival! You will find lots of lovely quilts over here (kind of trick and treating from the comfort of your own home... don't you think?)


(p.s. if you would like to see more of my triangle quilts, you will find them by clicking on the triangle label under this post)

Thank you for stopping by!

21 June 2012

summer solstice


it's a quiet and sunny morning of summer solstice

and I'm having a little photoshoot on the terrace

showing my hand-quilting in perle cotton a good 7" apart


enjoying some good company as Mars is waking up to the adventures of the day

(comfortable in having the house to herself? )

so many tempting smells and sounds for a kitty...


there's a lot of good therapy in quilting by hand...

and I have been busy finishing both these two triangle quilts

... just easy and steady stitches

luckily I have three more tops waiting...

summer sorbet finished at 70" by 72"
sunset garden finished at 59" by 72"

both hand-quilted in perle cotton on Hobbs Thermore polyester batting

Happy with both quilts. Hope they will be used ouside on the terrace enjoying the few light summer evenings we get up here...

Wish you all a beautiful summer solstice!

06 June 2012

wednesday wip


putting the extra wanna tri edges together for a pillow

wish you all a wonderful wednesday

; )

04 June 2012

wanna tri? - making the top


Once you are happy with your layout it's time to sew the triangles together. For the "random" layout I decided to sew them into diagonal rows, then sections.

I found it useful to chain-piece the diagonal rows. First into pairs, then into foursome, then eight...

The dog ears works as a guide when you place your triangles together. No need to pin until you sew the rows together.   ; )


Picture shows sections of 4 triangles being chain pieced into a diagonal row.

Before I sew two rows together I finger-press the seams open and give the row a little steam press with the iron.


When sewing the rows together I choose to pin at intersections seam and between them. The dog ears are helpful in lining it all up.


I finger-press and steam the seam when I have sewn two rows together. Then join the rows into sections. Starting from lower right corner I made a section of 4 rows. Starting from upper left corner, I made another section of 4 rows.

Picture shows how I sew the top together in sections. Three rows in the middle are not pieced together yet. 

Pressing with steam after sewing two rows together.

Seam ripper showing the scale of these 8" equilateral triangles. 

A few patches are turned backside up on purpose. This gives you a "bleached out" variation of a light print.

So, that's it! I hope you have a good idea of how to make your own Wanna tri? quilt, someday...

Wish you all a great week!


03 June 2012

wanna tri? - adding and subtracting


This is the current status of the design wall. There's been a lot of editing, the darkest Aboriginal dots and Persian vase prints have been added. The lightest (sand) Aboriginal dots and a print with quite a bit of orange had to go. A lot of pink Aboriginal dots had to leave, too. The color-scheme is now mainly olive and pink. 


It has a warm feel - thinking it is more a sunset garden than a summer garden...


Leaving it for a bit, planning to keep it like this...

; ))

wanna tri? - the puzzle


The next step of this wanna tri? play-along is both the most frustrating and fun part of the process. 
We will put the triangles on the design wall and start the puzzle. 

My design wall is a large piece of Warm and Natural cotton batting partly hung by curtain clips and partly taped to the wall with painters tape. A design wall is a must have for working like this. If you haven't tried it yet I have to tell you it is a wonderful tool...


I choose to make my third equilateral triangle quilt top from the summer garden bundle and started by cutting triangles from half of the fabric, randomly placing them onto the design wall. This way I could see how much of a contrast in value they had, and how well the colors played together. By cutting only half of the fabric first you can better judge if the rest of your preselected bundle will mix well, and then decide which one to add and which one to leave out.

At first it's all quite chaotic, and easy to think there's no way this will work! This is part of the process, don't panic yet...

My summer garden bundle contained a few Martha Negley flowers in different palettes that all seemed to play well together. I decided to let them be the focus fabric, and try to build a palette around them. They would stay, others would have to leave the party if they didn't mix well.


Stepping back and looking at the design wall, I noticed that the dark green Wood Ear print didn't play so well with the rest. They were the first to leave. Stepping back again, I saw the same thing happened with the orange and pink non-floral prints. So they were taken away, too. 

Now the colors mixed well. Still, the overall impression was quite busy...

I noticed that my three colors of Aboriginal dots would be a good backdrop for the busy flower prints. Luckily I has a large piece of the pink Aboriginal dots, and decided to put them in a checkerboard grid as a base...

This grid was a good reference for size. And as help to place the rest of the triangles...

I then started filling out the grid, little by little in a random fashion...

focusing on the distribution of print and value...

filling in all the patches first
then breaking up the regularity of the grid...

The essence of working this way is using your eyes to judge what you see in front of you:
  • step back, assess, replace a triangle, then another, step back ...
  • swap a few triangles, step back ...
  • and then move a few triangles around, working towards "random" ... 


Once you are happy with your layout, I think it's good to leave it for 24 hours before sewing them together. This will give you a chance to see the contrast at different times of the day (morning, mid day and evening) and also notice a few little changes you would like to make. Walking away is important, to get a fresher look when you return. A reduction glass can also be a helpful tool. I have a I cheap door viewer that helps to focus on the overall value distribution in the top.

So, what's next?

Next step is sewing the triangles together. I am going to leave my layout for at least 24 hours before I will start sewing them together. The next post will make a few suggestions and share a few ideas on how to turn the puzzle into a flimsy...

02 June 2012

wanna tri? - cutting the triangles


Next step in the wanna tri? play-along is showing my way of cutting the equilateral triangles from 8" strips:

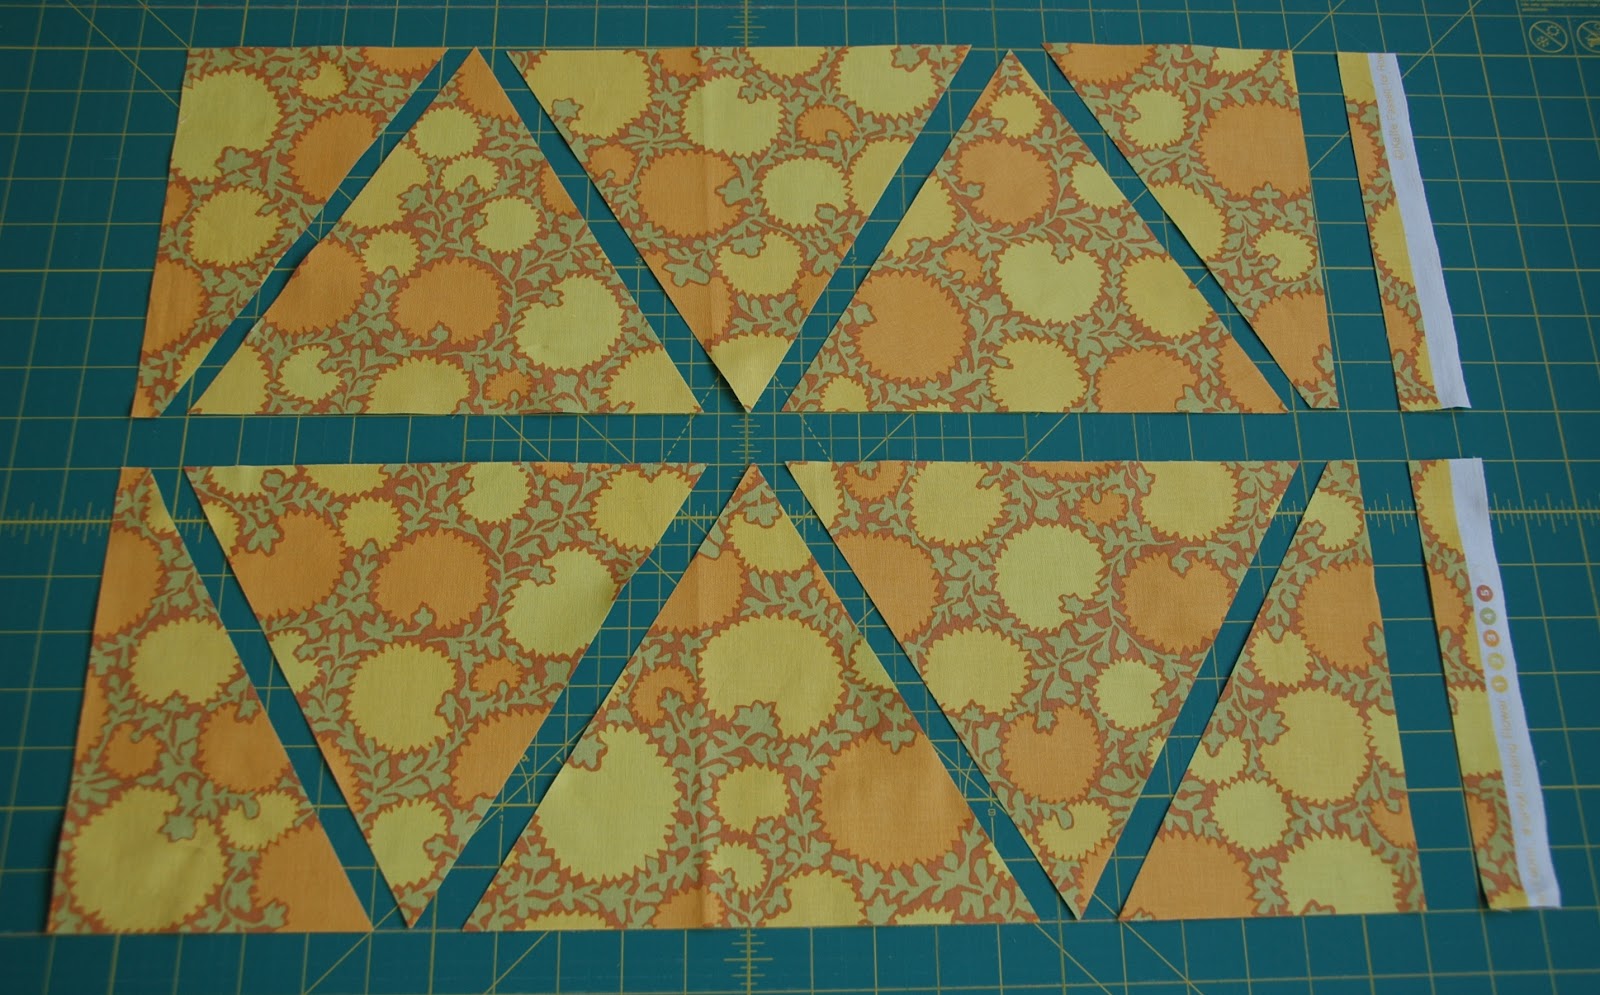
Cutting 7 triangles from a 1/4" yard


 start by folding the selvedges together, iron the fabric and cut an 8" strip


with the strip folded you will cut 2 layers of fabric
line up the triangle ruler on the fold, and make the first cut

turn the triangle ruler and make three more cuts

use your regular ruler and make the last cut 1/2" from the top point of the half-triangle
this will give you 2 shapes for the end of the rows

unfold the first piece, press the fold out of the fabric and square it up with the triangle ruler

there should now be 7 triangles plus 2 half - triangle shapes

Cutting 6 triangles from a FQ:

 iron the fabric and cut two 8" strips

important: place the the two strips wrong side of fabric together,
straighten up the edge of both layers, and place the triangle ruler so that you will have an extra 1/2" on the left of the first half-triangle shape (mirroring the end shape)

cut out three full sets of triangles, and make another set of mirrored half-triangle shapes

there should now be 6 triangles plus 2 half - triangle shapes

Cutting 14 triangles from a 1/2 yrd:

start by folding the selvedges together, iron the fabric and cut two 8" strips

place the two strips on top of each other, there will be 4 layers of fabric
line up the triangle ruler on the fold, and make the first cut, then three more
use your regular ruler and make the last cut 1/2" from the top point of the half-triangle
this will give you four shapes for the end of the rows 


unfold the first piece, press the fold out of the fabric and square it up with the triangle ruler
there should now be 14 triangles plus 4 half - triangle shapes


How many triangles do I need to cut?

Large size 72" by 72" has a layout of 16 a row for 10 rows: 160 triangles + 20 end shapes

Medium size 59" by 72" has a layout of 13 a row for 10 rows: 130 triangles + 20 end shapes

Small size 50" by 65" has a layout of 11 triangles a row for 9 rows: 99 triangles + 18 end shapes


So what's next?

I am planning my next post to be about the puzzle of the pieces, placing the triangles on the design wall, trying out different patterns: diamonds, random, diagonal lines, zig zag ... I will post as soon as I have pictures to share.

The next step is where all the fun begins...

; )))